Latest Facts and News in Sticker Printing
- The demand for custom stickers has surged, with businesses using them for branding and promotional purposes.
- Many printing companies are now offering eco-friendly sticker options, catering to environmentally conscious consumers.
- Innovations in printing technology have improved the quality and durability of stickers, making them more appealing to consumers.
- Online printing services have become increasingly popular, allowing consumers to easily design and order stickers from home.
- The global sticker printing market is projected to grow significantly, driven by the rise in e-commerce and personalized products.
In a world full of endless possibilities, stickers have found their place as versatile tools that blend creativity with purpose. Whether you’re looking to add a personal touch to your belongings, create eye-catching labels for your products or explore an exciting DIY sticker hobby, printing stickers has become more accessible than ever.
With advancements in printing technology and a variety of tools and materials available, making high-quality stickers is no longer limited to professional printers.
Follow along as we guide you step-by-step through the art of how to print stickers from printer. From selecting the perfect materials to mastering tools and techniques, everything you need is right here. Transform your creative ideas into standout stickers with ease!
Understanding Sticker Printing Basics
If you’re wondering how to print stickers from printer, it’s a simple process that involves selecting the right material, printer, and design software. Whether you’re making stickers for fun or business and printing them for yourself gives you full control over the design and quality.
Here’s a quick guide on the different types of stickers you can print:
Types of Stickers You Can Print
Stickers are a fun and creative way to personalise or promote something and there are a few different types to suit your needs. Let’s look at the popular options to help you decide what’s best for you when you print stickers from printer
1. Vinyl Stickers: Vinyl stickers are a favourite because they’re tough and weatherproof. Perfect for outdoor use, they stick to walls, cars and just about any surface. Plus, they last for ages!
2. Wall Stickers (Decals): Want to spruce up your space? Wall stickers are perfect for adding a splash of creativity to walls or smooth surfaces. They come in all shapes and sizes, making them great for customising your interiors.
3. Paper Stickers: Paper stickers are great for everyday use. Whether it’s for labelling jam jars, food containers or price tags, they’re super versatile. You can even add a gloss, matte or velvet finish to make them look extra fancy.
4. Holographic Stickers: If you’re after something eye-catching, holographic stickers are the way to go. They shimmer and change colours when you look at them from different angles, making them perfect for grabbing attention.
5. Die-Cut Stickers: These die-cut vinyl stickers cut to the exact shape of your design. Whether it’s a logo or a fun shape, die-cut stickers look neat and professional, with no extra background material.
6. Kiss-Cut Stickers: Kiss-cut stickers are super handy when you want multiple designs on one sheet. You can peel them off easily while keeping the backing intact. Great for labels, packaging or decorative purposes.
7. Foil Stickers: For a touch of luxury, foil stickers are a great choice. Available in shiny gold, silver or white, they’re perfect for premium branding and packaging.
8. Domed Stickers: Domed stickers stand out—literally! A clear, glossy coating gives them a 3D effect, making them durable, UV-protected and perfect for creating a premium feel.
9. Large Format Stickers: Bigger is better with large format stickers. Whether it’s window graphics, signage or any big statement, these stickers get the job done in style.
10. Scratch, Water & UV-Resistant Stickers: Need something extra durable? These stickers are made to handle tough conditions, whether it’s scratches, rain or sunlight. Perfect for long-lasting outdoor use.
Essential Tools and Materials
In the process of understanding how to print stickers from printer, having the right tools and materials is essential to get the best results. Let’s walk you through what you need to get started with:
Tools→
Getting the right tools ensures precision and quality in your sticker-making process.
1. Cutting Tools:
| Tool | Description |
| Cricut Explore 3 | A versatile tool perfect for beginners and professionals, allowing you to cut and draw on a variety of materials with ease. |
| Silhouette Cameo 4 | Known for its speed and ability to handle tougher materials, it connects wirelessly to a mobile device or computer. |
| Scissors or Craft Knives | Simple yet effective for basic cutting needs. |
2. Printers:
| Printer | Description |
| Inkjet Printers | Affordable and great for handling heavy image designs. |
| Laser Printers | Best for high-volume printing with fast speeds, though slightly more expensive. |
3. Software:
| Software | Description |
| Canva | Offers a user-friendly interface and a variety of templates, perfect for beginners. |
| Photoshop Express | Comes with basic editing tools and versatile filters for more detailed designs. |
| Affinity Designer | Ideal for professional-level precision with affordable features. |
Materials→
Choosing the right material depends on your sticker’s purpose and durability requirements.
- Vinyl Stickers: Durable and waterproof, these are ideal for outdoor applications like car decals, laptops and office signage. They adhere well to surfaces like metal, glass and wood.
- Paper Stickers: A budget-friendly option for indoor use, often used for product labels and packaging. Available in finishes like matte and uncoated.
- Polyester Stickers: Extremely durable and resistant to harsh elements like sun, rain and extreme temperatures. Perfect for long-lasting product labels.
- Holographic Stickers: Known for their iridescent glow, these stickers add a creative touch to any design, making them stand out.
Step-by-Step Guide to Printing Stickers
Printing your own stickers is really a recreational activity and a rewarding process, especially when you have the right tools and guidance. Here’s how you can print stickers from printer:
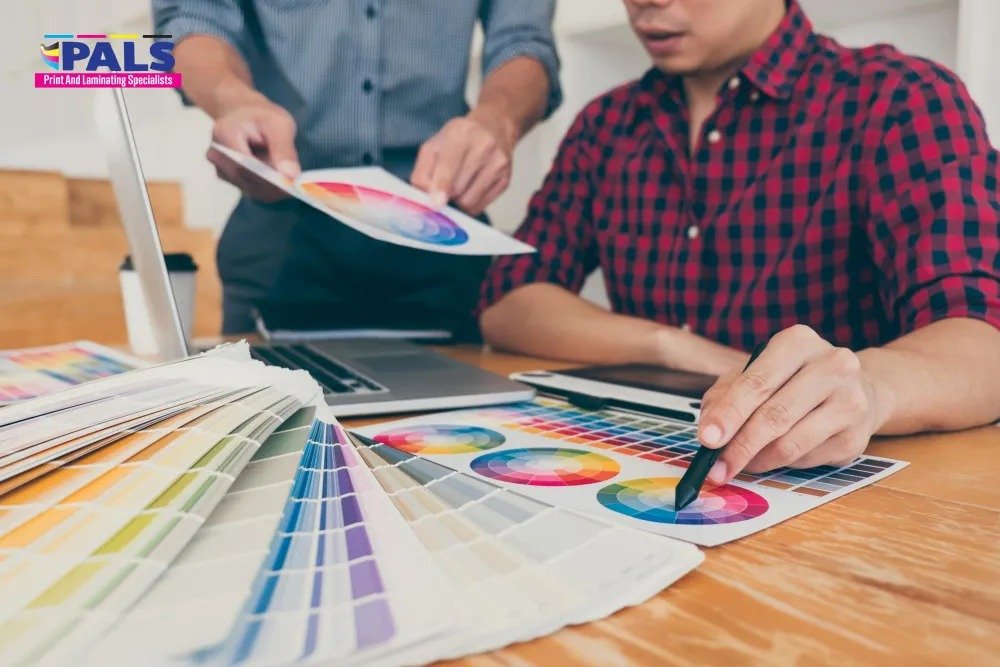
1. Design Your Sticker
The first step is deciding what your sticker should look like. It could be a catchy phrase, a sleek logo or even a detailed illustration.
Not sure where to start? print and laminating specialists offer a range of printable sticker templates to inspire you. Browse through and pick something you love or create your own design from scratch.
2. Create Your Sticker
Once you have a clear idea of your design, it’s time to bring it to life using sticker design software. Use tools like Canva, Photoshop Express or Affinity Designer to upload your artwork and create a new canvas. Make sure the canvas size matches your chosen sticker material.
- Position and resize your image to fit perfectly.
- Leave a bit of extra space around the edges for trimming later.
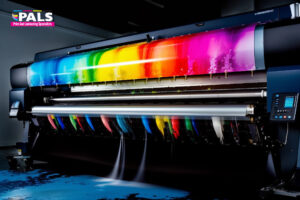
3. Print Your Sticker
When your design is ready, it’s time to print! Choose high-quality stock material like vinyl for durability and vibrant colours.
- Load the material into your printer (inkjet or laser, depending on your needs).
- Select the best print settings for sharp and vivid results.
PALS provides premium printing options, ensuring every sticker you print looks professional and stands out.
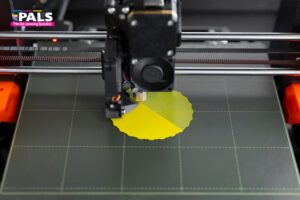
4. Cut Out Your Stickers
After printing, carefully cut out your stickers to achieve the desired shape and size.
- Use tools like the Cricut Explore 3 or Silhouette Cameo 4 for precise cutting.
- If you prefer a more hands-on approach, scissors or craft knives work just fine.
Remember to follow any cutting machine instructions for seamless results.
5. Peel the Backing
Once your stickers are cut, gently peel off the backing to reveal the adhesive. This step is crucial to prepare your stickers for application.
6. Apply Your Stickers
Now for the fun part! Stick your custom sticker printing on flat, smooth surfaces like laptops, water bottles, fridges or even car windows. Watch as your designs come to life and add personality to everyday items.
We also Design→ Custom Car Stickers
CTA Banner
The process of print stickers from printer is easy, but applying the steps in real life can sometimes not be as easy as it sounds. That’s why PALS offers this service, backed by the expertise, tools and technicalities needed to print.
| Print with PALS |
Post-Printing Tips
Print stickers from printer is just the start, but there’s more to do to make them look polished, last longer and be ready to use whenever you need them. Here’s a handy checklist to guide you through the essential steps after printing your stickers.
1. Cutting and Finishing Touches
Cutting your stickers neatly and adding protective layers can make a big difference.
- Use scissors or a craft knife for small batches or custom cuts.
- Try cutting machines like Cricut or Silhouette Cameo for clean, precise shapes.
- Add a laminate layer for extra durability and a sleek finish.
- Ensure edges are smooth to give your stickers a professional touch.
2. Storing Your Stickers
Proper storage keeps your stickers in top condition for as long as possible.
- Store stickers in a cool, dry place to avoid damage from heat or humidity.
- Keep them flat in envelopes, sleeves or boxes to prevent curling or creases.
- Avoid dusty areas to keep the adhesive clean and ready to stick.
3. Applying Stickers Smoothly
To get that perfect, bubble-free application, follow these steps.
- Clean the surface with a damp cloth to remove dirt and ensure a smooth base.
- Dry the surface completely before applying the sticker.
- Press the sticker from the center outward with a squeegee or card to remove air bubbles.
4. Testing Before Mass Application
It’s always smart to test before you stick everywhere.
- Stick one sticker on the surface and leave it for 24 hours to check adhesion.
- Check the colours under different lighting to ensure they pop as intended.
- Test on various surfaces to see how well it sticks and holds up.
5. Organising by Design or Purpose
Keeping stickers sorted will save you time and effort when you need them.
- Group stickers by size, design or purpose for easy access.
- Use clear sleeves or labelled boxes to keep everything organised.
- Store them in a way that lets you quickly find what you need without hassle.
6. Recycling Misprints
Don’t let misprints go to waste—here’s what you can do.
- Use misprints for internal or trial purposes, like labelling storage boxes.
- Get creative and repurpose them for personal projects or fun crafts.
- Recycle responsibly if the sticker materials are recyclable.
Do It With PALS
After covering every aspect of how to print stickers from printer,” it’s clear that expertise, experience and the right tools are a must. And talking about all this means talking about PALS, one of the best laminating and printing services Australia.
With us, you’re getting quality, precision and creativity all rolled into one. From premium materials to advanced techniques, we make sure your stickers are exactly what you envisioned. Whether it’s for personal use or professional branding, we’re here to bring your ideas to life with care and expertise.
Not just this, we also have multiple services beyond sticker printing; we do laminating, vinyl banners, PVC signs and anything that revolves around printing and lamination.
You name it and we will make it happen. You can also customize your prints with us.
Frequently Asked Questions (FAQs)
What type of printer is best for printing stickers?
The type of printer you need depends on your sticker goals. Inkjet printers are great for creating stickers with bright, detailed colours, perfect for smaller batches.
If you’re working on larger quantities or need something faster, laser printers offer efficiency and sharp results. For those looking for professional-grade stickers, PALS uses high-quality printers to ensure your stickers come out vibrant and durable every time.
Can I print stickers on regular paper?
While you can print on regular paper, it’s not the best option for stickers. Regular paper doesn’t have the adhesive or durability needed for long-lasting stickers. Instead, opt for vinyl or specialised sticker paper to get that professional finish.
And if finding the right materials feels overwhelming, PALS is here to help with premium options and advice.
How do I make my stickers waterproof?
Making stickers waterproof is simple when you use the right materials. Start with waterproof vinyl sticker paper and add an extra layer of protection with a laminate sheet or clear sealant spray. This keeps your stickers safe from water, scratches and sunlight.
If you’re looking for an easier way, PALS offers ready-to-use waterproof stickers that save you time and effort.
What software can I use to design my stickers?
Designing stickers can be fun and easy with tools like Canva or Photoshop Express, which are great for beginners. For more advanced designs, Affinity Designer gives you precision and flexibility to customise your ideas.
Whether you’re a first-timer or a seasoned creator, the right software can make all the difference. Not sure where to begin? PALS can assist with designing stickers that bring your vision to life.
How do I troubleshoot printing issues?
Printing stickers at home can sometimes lead to minor hiccups, but these can be fixed with a few adjustments:
- Double-check your printer settings to match the sticker paper.
- Clean the printer head to avoid streaks or smudges.
- Ensure the paper is loaded correctly to prevent jams or misprints.
- Run a test print to check alignment and colours before printing in bulk.
If troubleshooting feels tricky, PALS is just a call away. We can take care of the printing for you, ensuring your stickers come out perfect every time.